This post may contain affiliate links. Please see my disclosure policy for details.
The Ultimate Board Game Storage Solution: Vertical Organization That Actually Works
Contents
- The Ultimate Board Game Storage Solution: Vertical Organization That Actually Works
- Why Your Current Stacking Method Is Sabotaging Your Collection
- The Two-Step Foundation for Bulletproof Vertical Storage
- Reinforcement Tactics That Extend Box Life
- Alternative Storage Methods When Boxes Won’t Cut It
- Custom Organizer Creation for the DIY Enthusiast
- Furniture Solutions That Actually Accommodate Board Games
Vertical storage for board games changed everything for me, and I’m betting it’ll revolutionize your chaotic game closet too.
I used to play board game Jenga every time I wanted to grab Scythe from the bottom of my towering stack. You know the drill – carefully extract one box while three others crash to the floor, scattering pieces everywhere. Sound familiar?
After years of wrestling with toppling game towers and crushed boxes, I discovered the magic of storing games vertically like books. No more avalanches. No more damaged corners. Just pure, accessible gaming bliss.

Why Your Current Stacking Method Is Sabotaging Your Collection
Let’s be brutally honest about what’s happening in your game storage area right now.
Your beautiful $80 Wingspan box is getting crushed under five other games. The corners of your favorite cooperative game are splitting from constant pressure. You’ve probably given up on playing certain games simply because they’re buried at the bottom of the stack.
I’ve been there. My collection suffered serious damage before I figured out this vertical storage game-changer.
Here’s what vertical storage eliminates:
- Box crushing and corner damage
- Piece spillage from jostling stacked games
- The dreaded game avalanche
- Difficulty accessing buried favorites
- Wasted time reorganizing after each gaming session
The Two-Step Foundation for Bulletproof Vertical Storage
Before you start standing those boxes up like dominoes, you need to secure everything inside. Trust me on this – I learned the hard way when my first vertical experiment resulted in Monopoly money scattered across my entire shelf.
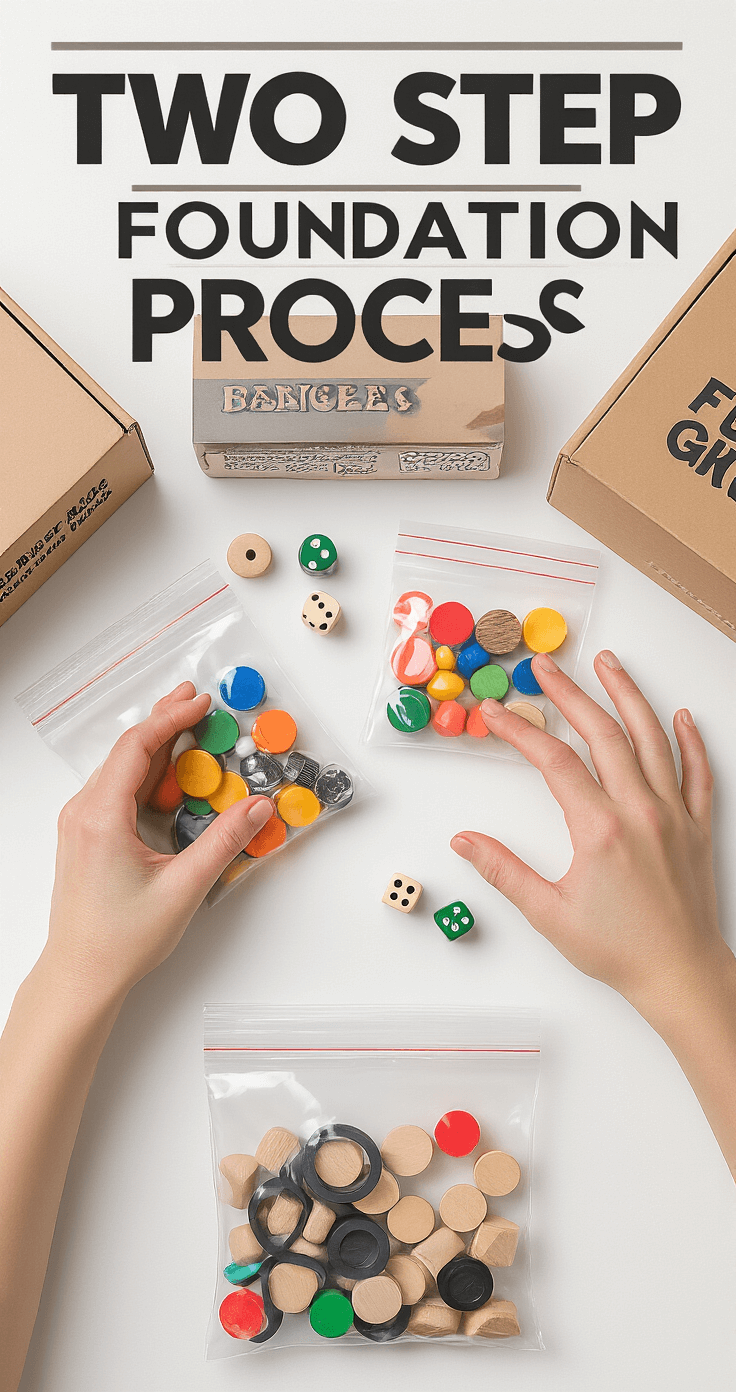
Step 1: Bag Everything That Moves
Every single loose component needs its own home. I use resealable sandwich bags for most pieces and snack-sized bags for smaller components like dice or tokens.
My bagging system:
- Cards in one bag (or keep in original tuck boxes if sturdy)
- Dice and small tokens together
- Large wooden pieces in their own bag
- Player pieces by color if applicable
- Keep instruction booklets loose – they help cushion other components
Step 2: The Rubber Band Revolution
This step separates the storage rookies from the pros. Large rubber bands wrapped around each box prevent lids from sliding off when stored vertically.
Pro tip: Position the rubber band so it doesn’t cover the game’s title when the box faces outward on your shelf. I wrap mine around the narrow sides, keeping the spine and front cover completely visible.
Reinforcement Tactics That Extend Box Life
Your game boxes take a beating over the years. Before committing to vertical storage, spend fifteen minutes with clear packing tape reinforcing any weak spots.

Target these vulnerable areas:
- Split corners (the most common failure point)
- Loose seams along the bottom
- Lid edges that show wear
- Any areas where the cardboard looks stressed
This simple reinforcement step has saved me from losing several beloved games to box failure.
Alternative Storage Methods When Boxes Won’t Cut It
Sometimes the original packaging just doesn’t work for your space or needs. I’ve experimented with several alternatives, and here’s what actually works.
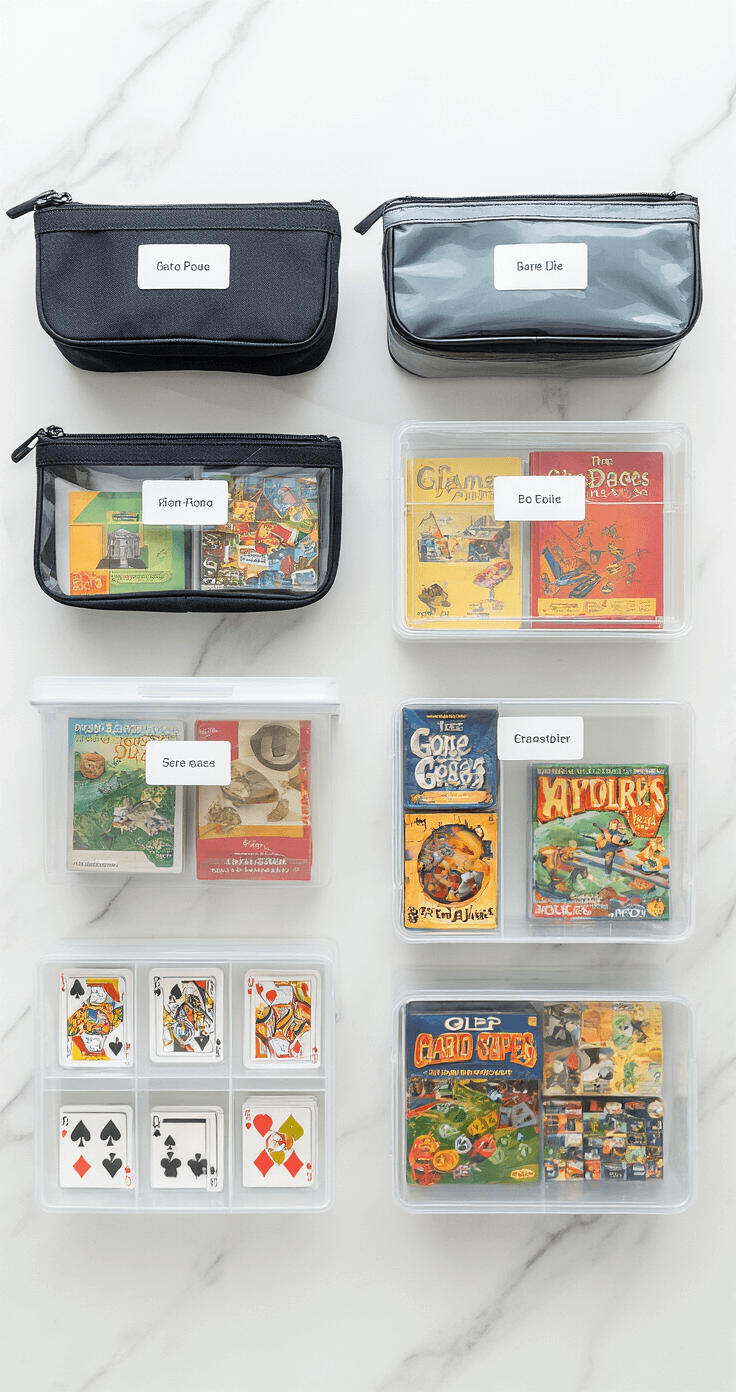
The Zipper Pouch Method
Large zipper pouches save tremendous shelf space, especially for games with oversized boxes that contain mostly air.
I create custom labels by printing miniature versions of the original box covers and laminating them. Then I attach these labels to each pouch with clear tape. The result looks professional and makes game identification lightning-fast.
Best candidates for pouch storage:
- Games with lots of empty box space
- Frequently traveled games
- Collections where space is at a premium
- Games with damaged original boxes beyond repair
Portfolio Box Uniformity
Clear portfolio boxes create a supremely organized, uniform appearance. Everything stacks perfectly, and you can see contents at a glance.
I use a label maker for clean, professional-looking identification labels. This method works particularly well if you’re storing games in a visible area where aesthetics matter.
The Transparent Bin Solution
Games with chunky, irregular pieces (think building games or marble runs) rarely fit back into their original packaging properly. Clear plastic bins with tight-fitting lids solve this problem completely.
These bins stack beautifully and make setup faster since you can see everything without opening containers.
Custom Organizer Creation for the DIY Enthusiast
Building custom organizers from cardboard revolutionized my game setup and cleanup times.

I create compartmentalized trays that fit perfectly inside each game box. During gameplay, I simply lift out the entire organizing tray. When we’re done, everything slides back into its designated spot, and the whole tray goes back in the box.
Materials you’ll need:
- Sturdy cardboard (shipping boxes work great)
- Sharp craft knife
- Ruler and pencil
- White glue or tape
- Optional: decorative paper for a finished look
The key is measuring your game components first and designing compartments accordingly. Start with one game to perfect your technique before tackling your entire collection.
Furniture Solutions That Actually Accommodate Board Games
Standard bookshelves often fall short for board game storage because game boxes vary wildly in height. After trying multiple furniture solutions, here’s what works best.