This post may contain affiliate links. Please see my disclosure policy for details.
How I Turned a Tiny Closet Into the Ultimate Cloffice (And You Can Too)
Contents
- How I Turned a Tiny Closet Into the Ultimate Cloffice (And You Can Too)
- Why Your Closet Is Secretly Perfect Office Real Estate
- What Kind of Closet Works Best?
- How Much Will This Actually Cost You?
- The Two-Hour Transformation (My First Attempt)
- How I Actually Styled It (Without Looking Like a Pinterest Fail)
Closet desk setups have saved my sanity more times than I can count.
When I moved into my cramped studio three years ago, I had exactly zero space for a proper office. My dining table doubled as my desk, my crafting station, and my place to stress-eat cereal at midnight. I was constantly shoving my laptop aside just to eat dinner.
Then I spotted that sad, underused bedroom closet staring back at me.
That’s when it hit me: why not convert this wasted space into something actually useful?

Why Your Closet Is Secretly Perfect Office Real Estate
Look, I get it. The idea of working inside a closet sounds claustrophobic at first.
But here’s what changed my mind:
Closets give you boundaries. When you work at a kitchen table, your “office” bleeds into every part of your life. With a cloffice, you literally close the doors at the end of the day. Out of sight, out of mind.
They’re already wired for transformation. Most closets have walls on three sides—perfect for mounting shelves, pegboards, and LED strip lights. You’re not starting from scratch with weird open corners.
Nobody judges your mess. Cables tangled? Papers scattered? Shut those doors and boom—your space looks pristine again.
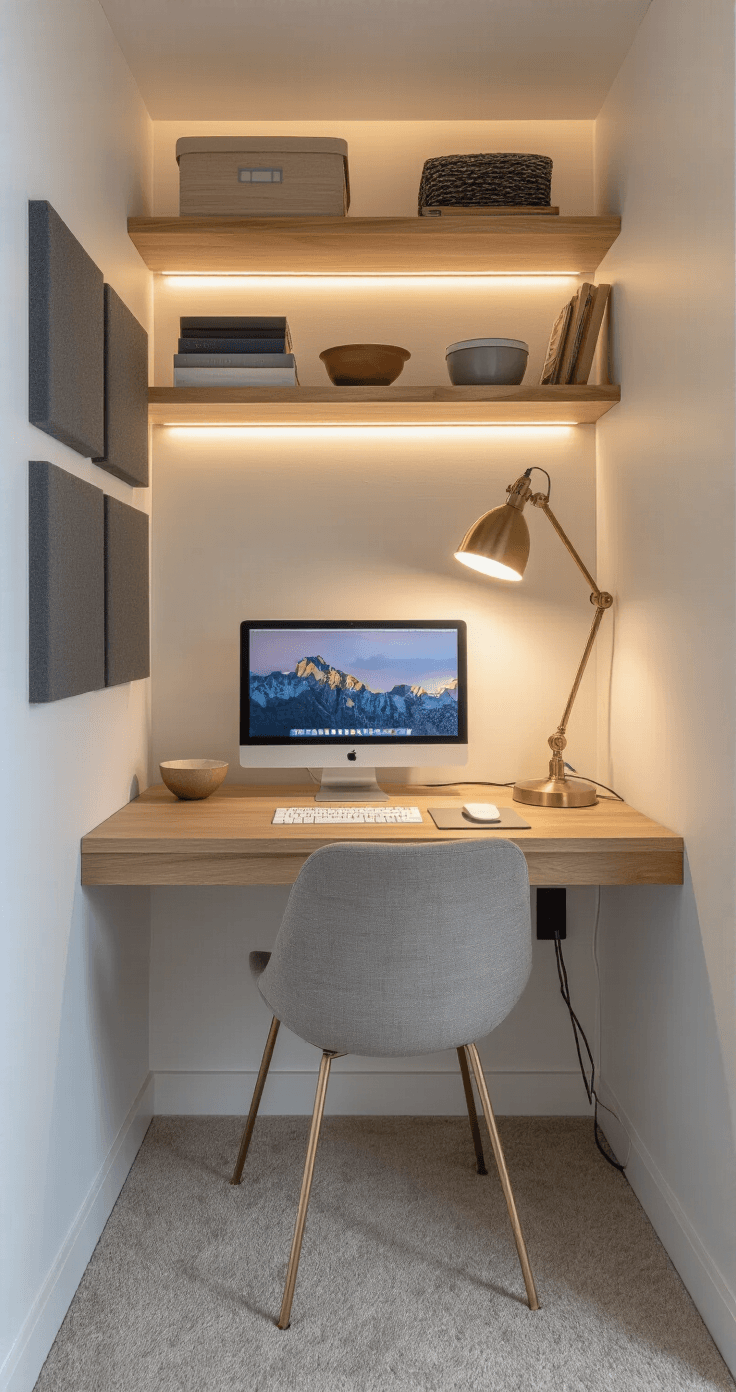
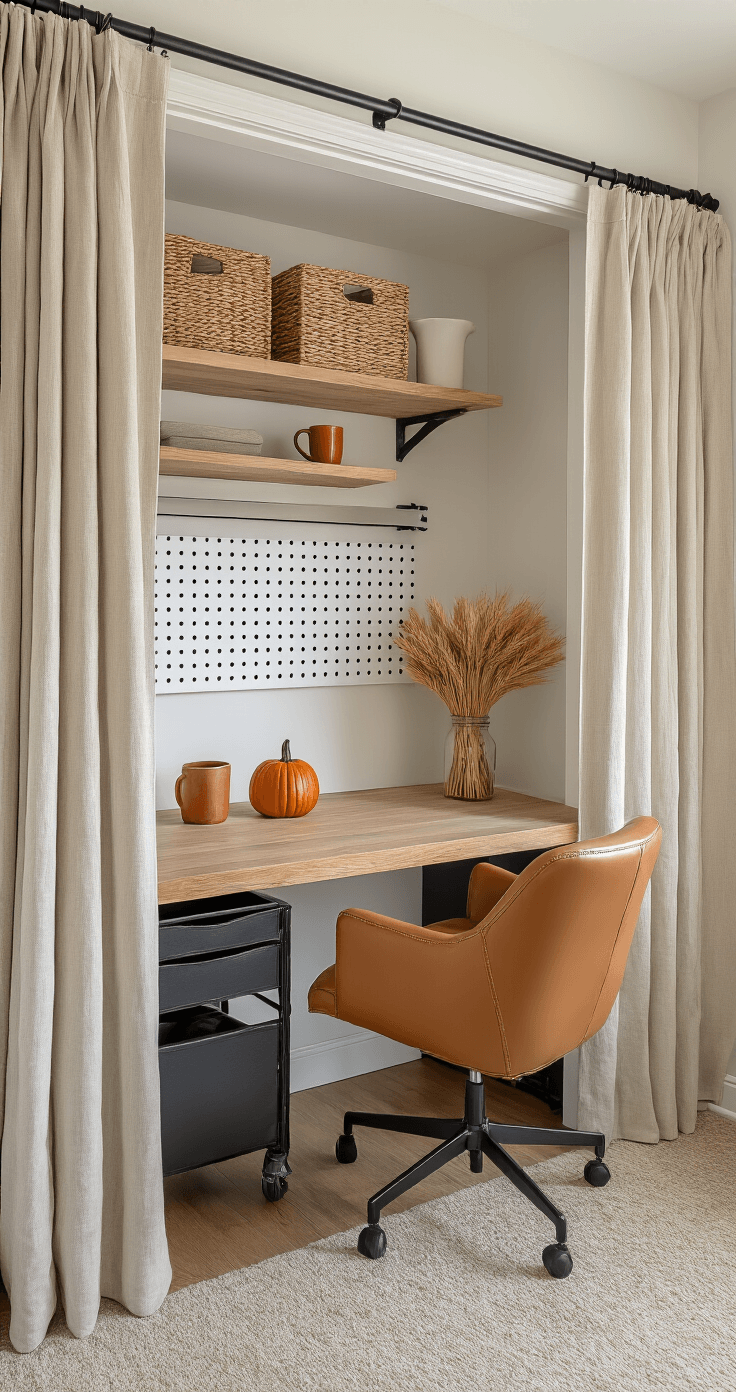
What Kind of Closet Works Best?
Not every closet is cloffice material, but most are closer than you think.
Standard reach-in bedroom closets (the ones about 3-6 feet wide and 22-30 inches deep) are absolute gold. That’s enough depth for a laptop, monitor, and a comfortable desk chair that doesn’t jam into your knees.
Hall closets work if you can sacrifice the coat storage. I’ve seen people do incredible things with awkward staircase nooks too.
Even those massive old wardrobes or armoires can become “office in a cabinet” setups. You just remove a shelf or two and boom—instant workspace that hides away.
How Much Will This Actually Cost You?
I’m not going to pretend everyone has unlimited funds.
Here’s what I spent on my first attempt:
Budget-Friendly Route ($75–$200)
- One sheet of plywood cut to size at Home Depot: $35
- Two simple floating shelf brackets: $18
- Paint (leftover from another project): $0
- Secondhand desk chair from Facebook Marketplace: $25
- Basic clip-on desk lamp: $15
- Random decor I already owned: $0
- Total: $93
The space looked good enough for Zoom calls and didn’t embarrass me.
Mid-Range Upgrade ($200–$500)
When I got a raise, I reinvested:
- Better ergonomic chair: $150
- Peel-and-stick wallpaper for the back wall: $35
- Proper floating shelves (not just brackets): $60
- Cable management kit: $22
- Small potted plants and frames: $45
- Dimmable LED bulbs: $18
- Total: $330
This version felt like an actual room instead of a hack job.
If You’re Going All Out ($500+)
Some people install custom built-ins, standing desk converters, acoustic panels for recording, and smart lighting systems. I’m not there yet, but I respect the dedication.
The Two-Hour Transformation (My First Attempt)
I’m going to be honest about my first cloffice setup. It was rough.
What I did right:
I cleared everything out first—every wire hanger, every forgotten shoebox, everything. The closet suddenly looked twice as big.
I patched the nail holes from the old clothing rod and gave the walls a fresh coat of soft white paint. This took 90 minutes but made the space feel clean instead of dingy.
What I messed up:
I didn’t measure the desk height properly. I mounted the plywood at 31 inches because “that seemed about right.”
My knees disagreed.
The ergonomically correct height is 28-30 inches for most people. I had to unscrew everything and remount it two inches lower. Learn from my impatience.

How I Actually Styled It (Without Looking Like a Pinterest Fail)
Styling a tiny space is weirdly harder than styling a big room. Every single item matters.
The Focal Point Rule
Your eye needs somewhere to land first.
For me, that’s the back wall. I added simple peel-and-stick beadboard wallpaper in warm white. It gave texture without being busy.
Some people do:
- A small gallery wall of frames
- One large piece of art
- A fun accent paint color
- Shiplap if they’re feeling farmhouse vibes
Pick ONE statement element for that back wall. More than that and the space feels chaotic.
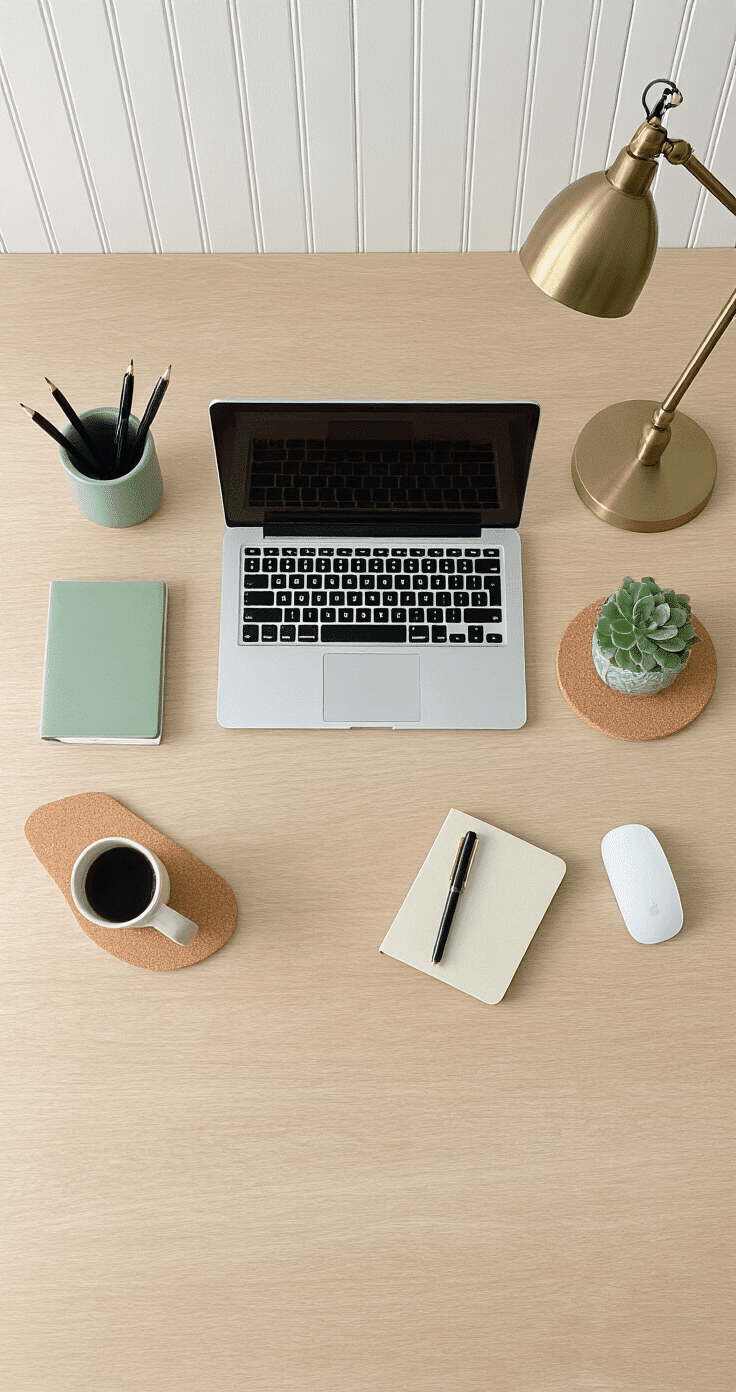
The Odd Numbers Trick
This sounds silly until you try it.
Decor items look better in groups of three or five.
On my desk right now:
- Coffee mug
<