This post may contain affiliate links. Please see my disclosure policy for details.
Why Your Pool Table Deserves Better Than That Tired Old Look
Contents
That pool table sitting in your basement or game room probably looks like it’s seen better days. Maybe the wood is scratched from years of cue sticks scraping against it. Perhaps the finish has that weird yellowing thing going on that makes everything look ancient.
Here’s what I discovered: painting a pool table involves refinishing the wooden structure with prep work, priming, painting, and typically re-felting the surface. It’s not rocket science, but it does require patience and the right approach.

Prep Work That Actually Matters (Don’t Skip This Part)
Strip It Down Like You Mean It
First things first – everything comes off. I’m talking about:
- Rails and bumpers
- Pockets (leather or plastic)
- Corner plastic pieces
- Any decorative trim
This step took me about an hour, but it’s absolutely crucial. You can’t paint around obstacles and expect professional results.
The Magic of Liquid Sandpaper
Here’s where I made my life infinitely easier. Instead of spending a weekend sanding like a maniac, I used liquid sandpaper.
This stuff is pure genius because:
- No dust clouds choking you
- Even coverage on detailed areas
- Saves your back from hours of manual sanding
- Works on curved surfaces where regular sandpaper struggles
Just wipe it on, let it sit for the recommended time, then wipe clean. Your wood is now ready for primer.
Fill Those Battle Scars
Every pool table has them – dents, scratches, and that one gouge where someone definitely wasn’t supposed to be doing tricks.
I filled everything with wood putty, then did a light sanding progression:
- 120 grit for rough spots
- 150 grit for smoothing
- 220 grit for that final silk-like finish
The Painting Process That Actually Works
Prime Time With the Right Stuff
Don’t cheap out on primer. I learned this the hard way on my first attempt.
Zinsser B-I-N Primer became my best friend because:
- Sticks to anything (seriously, this stuff is aggressive)
- Blocks stains from bleeding through
- Dries fast so you’re not waiting around forever
- Works on wood AND metal pieces
Apply it thin but even. Two light coats beat one thick, goopy mess every time.
Chalk Paint Changed My Whole Game
Here’s where things get fun. Chalk paint is perfect for pool tables because:
- No pre-sanding required (when used with proper prep)
- Covers imperfections beautifully
- Easy to distress if you want that vintage look
- Dries to a beautiful matte finish
I applied three thin coats to:
- Base structure
- Aprons
- Railings (though I switched to satin for these – more on that below)
Pro Move: Satin Paint for High-Touch Areas
The railings take a beating. Cue sticks scrape them, people lean on them, drinks get set on them.
I switched to satin finish paint for these areas because:
- Durability against daily wear
- Easy cleanup when spills happen
- Subtle sheen that looks sophisticated
- Resists scratches better than matte finishes

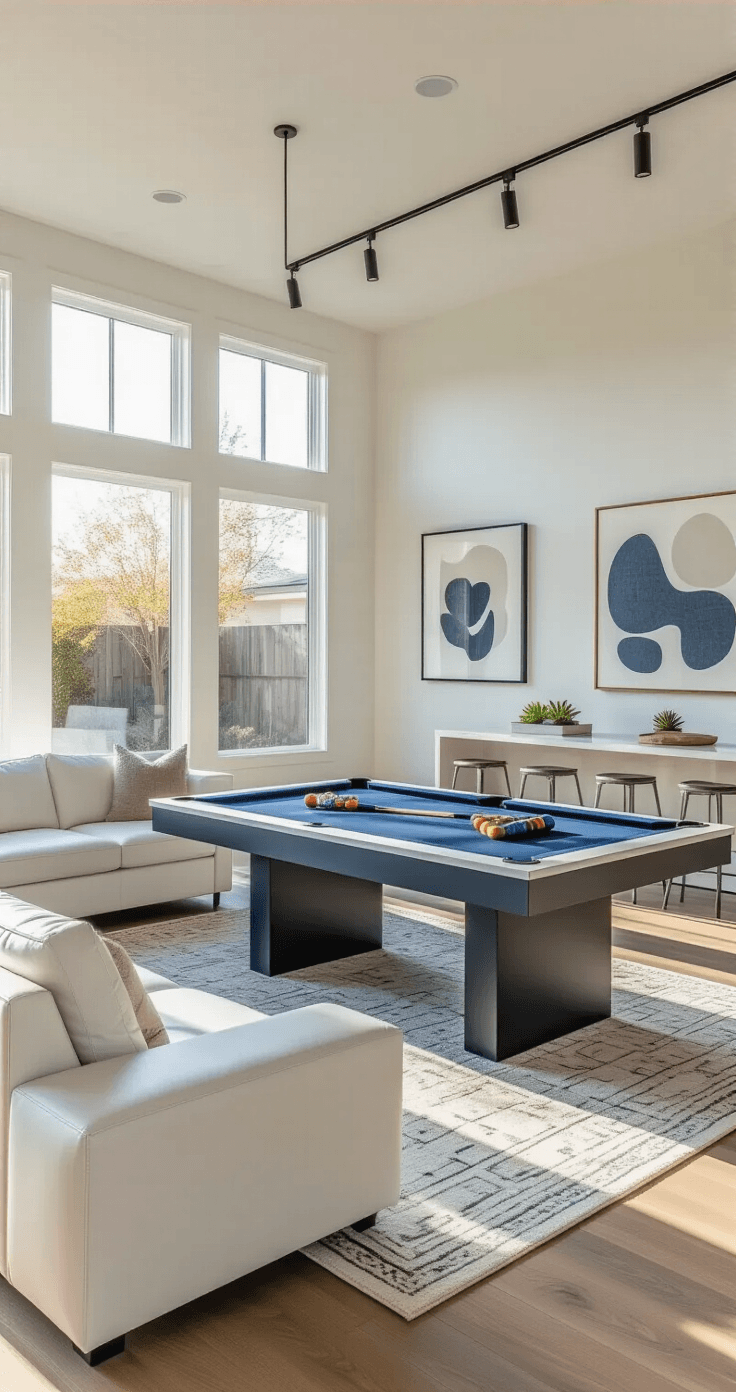
Two-Tone Magic That Never Gets Old
Black and gray. Navy and white. Forest green and cream.
Pick two colors that complement each other and watch your pool table transform from boring to brilliant. I went with charcoal gray for the base and crisp white for the rails – it looks like something from a high-end billiards hall.
Metal Pieces Need Love Too
Those corner brackets and metal trim pieces can’t be ignored. Spray paint works perfectly for:
- Corner brackets
- Metal triangles
- Decorative trim
- Hardware pieces
Clean them first with degreaser, light scuff with fine sandpaper, then spray in thin, even coats.

Assembly and the Final Stretch
Liquid Nails: The Unsung Hero
When it came time to reattach everything, regular wood glue wasn’t going to cut it. Liquid Nails provided the permanent bond I needed for metal-to-wood connections.
Clamp everything while it dries. This isn’t optional – it’s the difference between a professional finish and something that falls apart in six months.
Re-Felting: Know Your Limits
Here’s where I swallowed my pride and called a professional. Re-felting requires:
- Specialized tools
- Experience with tension
- Knowledge of proper adhesive techniques
- Ability to get it perfect the first time
The